Showing posts with label othercrafts. Show all posts

Saturday, December 8, 2018

Christmas statement craft - Star wall decor

The star is simple yet becomes the elegant piece of decoration that would definitely gain appreciation. Again, a craft that can be made using the things easily at home. A project for 10 -15 minutes!!
I had found this easy craft to make in Pinterest. The image itself is self descriptive. But yes will give the link to original page for the detailed a steps to make one this season.


Things need to make the crafts are:
Flat wooden piece. The wooden piece can be be joined to make a square shaped platform.
Chalk
5 Screws or nails
Broad ribbons - Red color

How to?
Draw a star shape on the wooden piece using a chalk
Screw the nails/screws at each point of the star
Wrap the ribbon around the nails in the star shape.
Tie a big bow at the top nail.
Star wall hanging is read! Can there be any statement craft be easy as this one?
I doubt.
I got this ideas from Pinterest and found to be a very old post.

Check for more Christmas crafts here.


Friday, September 7, 2018

DIY photo locket

TaDa! I found a super cool, super easy, super fun to do neck piece today - a photo locket - I always wanted to make this one. It hardly took anytime to make. All materials to make this one was readily available. Just had to cut, assort and glue!
Photoframe felt fabric necklace
Photoframe felt fabric locket 

Materials required:
  • Chain
  • Eye pin
  • Felt fabric
  • Scissors
  • Photo of your choice
  • glue

How to make it:
  • Cut two rectangular shaped pieces from the felt fabric.
  • Take one of the rectangular piece and cut a smaller square shaped window.
  • Optional: cut a square piece of transparent plastic sheet to cover the photo and glue on to the inner part of the square.
  • Glue the eye pin on the other rectangular piece.
  • Now stick the photo on the eye pin glued rectangular felt fabric.
  • And finally stick the outer fabric on to the inner fabric with the photo rightly placed on the window.
  • Attach the chain to the diy locket... :)

Photo fabric locket is ready to be worn!

Wednesday, August 22, 2018

How to make felt heart ornaments

Those who craft prefer homemade ornaments instead of a store bought object for decoration. Felt ornaments are easy to make decorative item which can be used year- round and save some cash. Here I am trying to describe the heart shaped felted ornaments which are easy to make and serve the purpose of decoration for any season.

Materials needed are:
  • Felt fabric
  • Heart pattern to cut from the fabric
  • Scissor
  • Sewing kit
  • Cotton
How to make it:
  • Cut two heart shape from the felt fabric using the paper pattern.
  • Start stitching the shapes together using blanket stitch.
  • Stitch it around the heart shape to complete the ornament
  • OR - stuff the cotton between the two shapes before closing the shapes to give added dimension.
  • See the below image for better understanding.

Felt heart can be used as ornaments:

Felt key chains: Simple crafty idea.. isnt it? Please check the here for the procedure to make one for yourself.
Felt key chain
Felt heart key chain
Felt heart wall hanging: This wall hanging add color to  the wall. Also check here for more wall hanging ideas.
Felt heart wall hanging

Felt heart brooch: Simple smiling brooch to make.
Felt heart brooch

And more ideas:


Please let  me know in case there is any suggestions. Check the page for more creative ideas.
Thank you!!


Thursday, August 16, 2018

Napkin pouch - An Super easy felt craft

Making a craft with felt is super beneficials as the edges won't fray. And since this project doesn't require a lot of fabric, it's perfect for using up scraps and buttons - which are easily available. 

Here is a super easy felt pouch to store the napkins which will take less than 10 mins of our time.

napkin holder
Felt napkin pouch
Materials needed:
Felt fabric
Scissors
Sewing accessories

How to make Felt pouch:
Cut the felt fabric in a rectangular shape.
Find the mid part of the fabric and mark it.
Fold in the fabric to meet the ends at the center
Sew a running stitch at ends of the fabric.
If needed add buttons or embroidery or initials to the pouch.

Felt pouch for napkins is ready.
This is a easy project to try and an add-on in our handbag to stop the struggle finding our napkins... :)

Saturday, August 4, 2018

Friendship bands - handmade

1st Sunday of August - Friendship day

Friends - an important part of our life - to share our thoughts - to get insights - to be loved and cared genuinely - to be just there besides us when we really need someone. Friends can be anyone - its the understanding between the two. I love all my friends - truly... Happy friendship day guys!!

This is a post I am doing after a long time. But I had a great week this time. Today I happened to take a craft class for school students. I am amazed with the interest the little ones showed to make the colorful and elegant friendship bands to gift it to their best friends. All of them made with simple colored papers, glue and lot of love for their friends. I could seriously see their interest to make it..1..2..3.. and more in the span of an hour!  The little ones made so many variation of one band I showed them.  My heart is full.. I too got a lot of them from the little ones (and my daughter stole it from me..its in her custody now.. I am still searching where is it kept)


Happy Friendship day

So.. I have a few friendship bands for the kids.. simple ones, which are easy to make with easily available materials. I would request all the parents to help the kids make some of them, so that they can present it to their friends.. Of course its easy to busy gifts; but when it is made.. we put those personal touch to it.. which is very important when we are gifting it to our friends...

I hope the images is self descriptive to make.. In case anyone have any doubt, please message me and will be happy to help you make one..

Lego friendship bands - I am sure little gentle men at our house will love to make this. Lego is one of the play item every house will have if they have little ones between  3 and 7. A great friendship gift to make at the last minute!


lego friendship bands
Lego Bands
Color pencil pencil friendship bands: Another easy to make bands with the very easily available left over color pencils. Cut the small peices of color pencils, drill a hole and strings them!
Color pencil pencil friendship bands

Popsicle sticks friendship bands: Yet another easy and elegant ones to make are these. Use color strips to make different patterns.


Popsicle sticks friendship bands


Button friendship bands: Button and yarn is all we need to make these. Again one of the last minute bands to make.

Button bracelets

Colorful beaded friendship band: The beaded friendship bracelets are just so cute and so easy for kids to make themselves. The beads are so colorful and we can include positive messages with the lettered beads in them. 


Beaded friendship bands
Beaded bracelet

More friendship bracelets I liked:


Friday, July 6, 2018

How to make Tassels - diy craft

Tassels - easy to do, most common embellishment to use

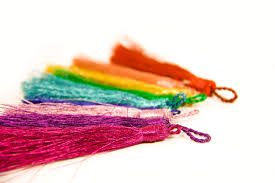
Tassel is an easy to do embellishment - be it in scarves, pillow case, blankets, make garlands - decoration, bookmark, shoes, hats, purses or jewelry. I like to use both tassel and pom poms in my crafts as frequently as possible. 
This is an attempt to explain the procedure to make a tassel in the most easiest way.

steps to make tassel
Tassels


Materials required:

Yarn
Scissors
Cardboard - to wrap the yarn

Method
  1. Wrap the yarn around the cardboard piece. Use the cardboard piece which is little longer that the required length of the tassel, as the last step is to trim the tassel.
  2. Cut the yarn when you feel the density of the tassel is reached. Make sure the yarn has reached at the end of the cardboard on the final wrap.
  3. Tie a piece of string on one side of the card board around the bunch of yarn 
  4. Take the yarn out of the card board and hold the tied part of the yarn and cut the other end of the bunch.
  5. Tie a piece of string around the yarn bunch 1\2 inch down the top.
  6. Trim the tassel at the bottom to make it even with a sharp pair of scissors.
Our tassel is ready.

Check below some of the variation of yarn tassels that can be made using similar procedure.

Ribbon tassel

Leather tassel

Paper tassel
bead tassel

chain tassel 
Fabric tassel


Tread tassel

Silk thread tassel


Thursday, July 5, 2018

Pom pom - a easy craft to make


How to make pom pom 

POM POM – one of the cute craft to make in you free time. Can be used anywhere – decorate a room, a dress, make a cute toy for young ones.. much much easier one to make. There are several ways to make pom poms. One shown below is just one of them:


Materials required:

Yarn of any color – Very thick chunky yarn is good to make large sized ones and finer yarn can be used to make same sized pom pom
Cardboard – to make pom pom maker
Scissors

Method:

Cut two circular shapes from the card board. Then cut a wedge on both the card board and then a smaller circle at the center. Place the two pieces of cardboard one above the other with the wedges on the same side.

Next place the yarn in the middle of the cardboard with a tail little longer to be used to tie the yarn together at the end.

Start winding the yarn around the two cardboard to make a plump one. The thicker the yarn winded, more denser the pom pom looks.

Put the scissors between the card board and cut open the yarn. Make sure the end tail that we put between the cardboard is not cut shorter.

Secure the pom pom with the yarn tail tightly.

Remove the pom pom slowly from the card board.

This is the easiest method of making pom pom.


I also found a better pom pom  maker in the website - The card maker in the above website is not circle but rectangle. I seriously think that it actually make sense to make the card maker in a rectangle shape
Instead of using yarn to make pom pom, we can use tulle fabric pom pom, craft paper pom pom, or the simply cloth cut from t-shirt.


yarn wrapped aro


Multiple pom pom - smarter technique

Tulle pom pom

Make pom pom using fork

Paper pom pom

And the best: Pom pom flower: Beautiful isn't it?


Wednesday, June 27, 2018

Paper clip bookmark

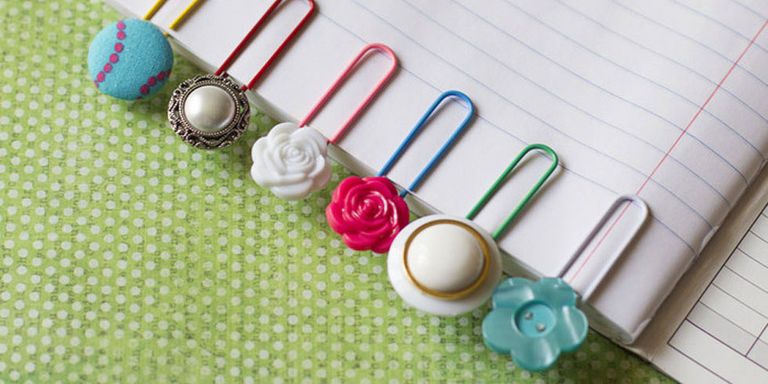
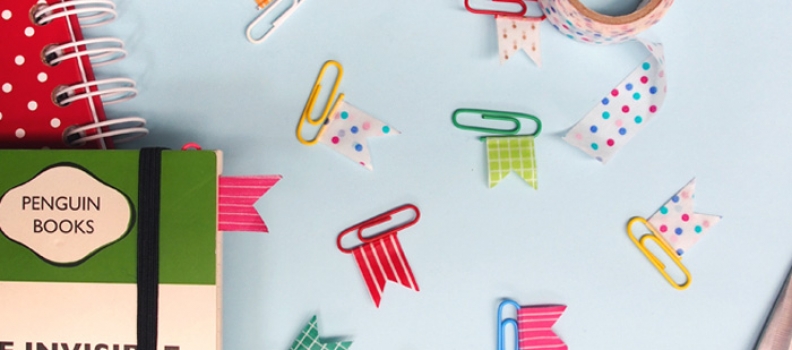
DIY paper clip book mark is much easier to make and more used by anyone who loves reading. It is just adding on some elegant add-on like a ribbon, paper or fabric bow,  button, cute embellishments, pom pom, washy tapes or tassels to make it more beautiful!


  Materials required:
  • Paper clips/U pins
  • Ribbon or any embellishments
  • Glue
How to make it:

Stick the embellishment or tie the bow on the top part of the paper clip. Or stick the washy tape on the bookmark and the paper clip book mark is ready!!

Paper clip bookmark
Button bookmark


Felt bookmark

Washy tape side bookmark
Bow bookmark


Pom pom bookmark


Tassel bookmark

And the most easy bookmark is:


Let me know if you have made any of these. Love to see them. Please send a image and will add it to the post.. Happy crafting! 🙆