Showing posts with label homedecor. Show all posts

Saturday, December 8, 2018

Christmas statement craft - Star wall decor

The star is simple yet becomes the elegant piece of decoration that would definitely gain appreciation. Again, a craft that can be made using the things easily at home. A project for 10 -15 minutes!!
I had found this easy craft to make in Pinterest. The image itself is self descriptive. But yes will give the link to original page for the detailed a steps to make one this season.


Things need to make the crafts are:
Flat wooden piece. The wooden piece can be be joined to make a square shaped platform.
Chalk
5 Screws or nails
Broad ribbons - Red color

How to?
Draw a star shape on the wooden piece using a chalk
Screw the nails/screws at each point of the star
Wrap the ribbon around the nails in the star shape.
Tie a big bow at the top nail.
Star wall hanging is read! Can there be any statement craft be easy as this one?
I doubt.
I got this ideas from Pinterest and found to be a very old post.

Check for more Christmas crafts here.


Thursday, November 29, 2018

Sea Urchin wall decor - diy home decor

Now this one is an amazingly less time consuming diy craft for home decor. It gives a modern look to any wall it is in.. be it living room, family room, entry way. Our friends and family will be definitely taken back with the exciting wall craft.

home decor -sea urchin craft
Sea Urchin diy wall decor

All you need is:

  • Styrofoam ball - size depends upon how big or small urchin we need to make
  • Wooden skewers
  • Spray Paint - golden and black
  • A knife
  • Scissors
  • Glue

How to do:


  • Cut the Styrofoam ball into half.
  • Cut all the skewers to the desired length using the scissors or wire cutters
  • Stick the skewers into the base of the Styrofoam ball - in a circular pattern for a uniform look. The trick here is that insert the skewers into the foam ball to make a hole and then take it out. Apply some glue into the hole and insert the skewers back. This helps in the skewers to stick strongly to the foam.
  • Keep inserting the skewers until the look of sea urchin is got.
  • More skewers when added, the better it looks. This covers the Styrofoam ball at the base to give a rich look. 
  • Paint it using spray paint.
        Suggestion: we can either paint the entire craft with a silver or golden paint.
        Or paint the middle part with black and towards the end of the skewers                  paint it with golden color to give that antique look!
  • Add the double sided tape at the base of the Styrofoam ball to be stuck to the wall or even on the table.


The classic wall decor is ready!


And add-on: In case you want to know how the real sea urchin looks like, please check the below picture:


Wednesday, August 22, 2018

How to make felt heart ornaments

Those who craft prefer homemade ornaments instead of a store bought object for decoration. Felt ornaments are easy to make decorative item which can be used year- round and save some cash. Here I am trying to describe the heart shaped felted ornaments which are easy to make and serve the purpose of decoration for any season.

Materials needed are:
  • Felt fabric
  • Heart pattern to cut from the fabric
  • Scissor
  • Sewing kit
  • Cotton
How to make it:
  • Cut two heart shape from the felt fabric using the paper pattern.
  • Start stitching the shapes together using blanket stitch.
  • Stitch it around the heart shape to complete the ornament
  • OR - stuff the cotton between the two shapes before closing the shapes to give added dimension.
  • See the below image for better understanding.

Felt heart can be used as ornaments:

Felt key chains: Simple crafty idea.. isnt it? Please check the here for the procedure to make one for yourself.
Felt key chain
Felt heart key chain
Felt heart wall hanging: This wall hanging add color to  the wall. Also check here for more wall hanging ideas.
Felt heart wall hanging

Felt heart brooch: Simple smiling brooch to make.
Felt heart brooch

And more ideas:


Please let  me know in case there is any suggestions. Check the page for more creative ideas.
Thank you!!


Saturday, July 14, 2018

DIY wall hanging

       Wall hangings are anything you can hang on the wall that adds the sense of your creativity and it gives a clue of how artistic you are, right?! We all love decorating all our rooms, be it living room, kitchen, bed room or our home offices. It brings the aesthetic look to the room. There are lot of ideas of DIY wall hanging you get online. Here, I have attempting to give an idea of just one of the home decors, which is extremely easy to make and can be hanged in any room..


Materials required:

Wooden branch
Yarn
Any shape cut outs
Beads


How to make it


  1. Wrap the yarn around the wooden branch.
  2. Tie a long yarn on the two sides of the branch, this will be to hang the wall hanging.
  3. Tie the yarn to the branch at the equal distance.
  4. Attach the cut outs to the yarn as patterned as you feel.
  5. Put a bead at the end of each yarn.
  6. Put a hole on the star and attach it to the yarn and tie it tightly.

Simple yet beautiful yarn is ready!!!

These wall hanging can be made definitely with the things available around the house and within no time. These are some of the home decors that we can make when we want an immediate make over of the room. I love these for they are easy to make and kids can be involved to make it too.. A touch of glitter anywhere possible is as good as it is without it. :) 

Here are some more of the similar wall hanging that can be made:


clay moon phase wall hanging

Butterfly paper wall hanging

Dream catcher wall hanging

Feather wall hanging
Feather wall hanging 

Flower wall hanging
Flower wall hanging

Circle paper wall hanging


Photo wall hanging
Photo wall hanging

flower-leaves wall hanging

Pom pom  wall hanging
Pom pom  wall hanging

Shell wall hanging
Shell wall hanging

Shell wall hanging
Shell wall hanging

Stars wall hanging
Stars wall hanging


Tassel wall hanging
Tassel wall hanging

abstract wall hanging


Monday, July 9, 2018

Home decor – Yarn wrapped bottle vases


This is a super cute DIY home decor to make with easily available bottles and some colorful yarn. It is simple, yet elegant and stylish.  It adds the color to the room and is hence my favorite room decor. 
Yarn wrapped bottle vases - home decor
Yarn wrapped bottle
Things you will need:
·         Glass bottles
·         Yarn of vivid and bright colors
·         Glue
·         Scissors

Method:
1.      Remove any stickers on the bottles and wash the glass bottles neatly and let them dry.
2.     Apply glue on the neck of the bottle and start winding the yarn
3.     Continue applying the glue on the bottle and wrapping the yarn till the end of the bottle.
4.     Different colors of yarn can be used on different bottles or different colored yarn can be added on the same bottle.


Theses bottles can be used as vases in any part of the house – be it the living room, kitchen or hall way. Please try this simple project and let me know how it looks. Thank you!
 Like always there is no limit to embellishments to add to this craft too. Yarn and bottle can be used to create hundreds of home decors. 


Friday, July 6, 2018

How to make Tassels - diy craft

Tassels - easy to do, most common embellishment to use

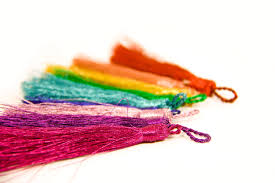
Tassel is an easy to do embellishment - be it in scarves, pillow case, blankets, make garlands - decoration, bookmark, shoes, hats, purses or jewelry. I like to use both tassel and pom poms in my crafts as frequently as possible. 
This is an attempt to explain the procedure to make a tassel in the most easiest way.

steps to make tassel
Tassels


Materials required:

Yarn
Scissors
Cardboard - to wrap the yarn

Method
  1. Wrap the yarn around the cardboard piece. Use the cardboard piece which is little longer that the required length of the tassel, as the last step is to trim the tassel.
  2. Cut the yarn when you feel the density of the tassel is reached. Make sure the yarn has reached at the end of the cardboard on the final wrap.
  3. Tie a piece of string on one side of the card board around the bunch of yarn 
  4. Take the yarn out of the card board and hold the tied part of the yarn and cut the other end of the bunch.
  5. Tie a piece of string around the yarn bunch 1\2 inch down the top.
  6. Trim the tassel at the bottom to make it even with a sharp pair of scissors.
Our tassel is ready.

Check below some of the variation of yarn tassels that can be made using similar procedure.

Ribbon tassel

Leather tassel

Paper tassel
bead tassel

chain tassel 
Fabric tassel


Tread tassel

Silk thread tassel


Tuesday, June 19, 2018

Rock painted cactus for Home Decor


The painted cactus is an easy to do, clean and low maintenance craft which is why this becomes one of my favorite home decor. Painted rock garden is what I call them.. 
It can be be placed on the selves, working desk, dining table of even kitchen counter tops to give that fresh and elegant look of the room.

Painted cactus for home decor


Materials required:
Mini clay or tea cups
River rocks
Small pebbles/ Sand
Paint brush
Acrylic paint
White permanent pen
Permanent glue

How to make it:
Spread the newspaper on the working area and paint the river rocks with green color.
Leave the rocks to dry completely

Once the green color dries, using the white permanent pen, draw the cactus patterns. Use dots, lines, stars to create effects.

Place the painted rocks inside the clay pot or tea cups and cover them with smaller pebbles or simply with sand.

If needed glue the smaller rocks (smaller new leaves, flower or buds)  on the bigger rock to give that close to original look.
Tada! The painted cactus mini pot is ready!